

Resource 05 – Otras herramientas específicas
En este apartado no se explicará el uso de CorelDraw para maquetación, sino que simplemente se mostrará el proceso de traducción de archivos de CorelDraw (de extensión CDR), desde su preparación utilizando el programa Sysfilter, pasando por la traducción y la revisión en SDL Trados Studio y la conversión de vuelta a formato CDR para que el archivo de destino pueda ser maquetado antes de su entrega al cliente. Una vez hayamos instado CorelDraw y Sysfilter, seguiremos estos pasos como preparación para la traducción.
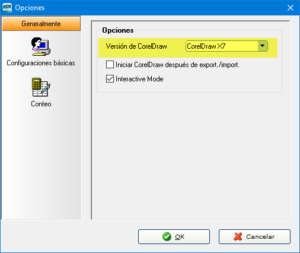
- Abrimos Sysfilter y vamos al menú Herramientas > Opciones, pulsamos en Configuraciones básicas y elegimos en el menú desplegable la versión de CorelDraw que se tenga instalada en el mismo ordenador (es compatible hasta con la versión X7). Luego solo hay que pulsar el botón OK.
- Entonces ya podremos navegar en el panel izquierdo hasta la carpeta donde hayamos guardado los archivos CDR de origen (es recomendable hacer una copia de seguridad). Ahora tan solo tendremos que asegurarnos de que estamos en la pestaña Opciones de exportación y de que la extensión CDR está marcada en el menú desplegable de la esquina superior derecha, como vemos en la siguiente captura de pantalla.
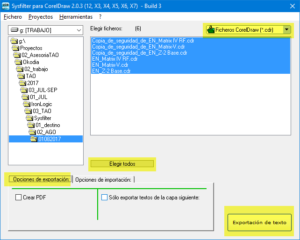
- A continuación, seleccionamos los archivos correspondientes en el panel central, marcamos la opción Crear PDF si así lo queremos y hacemos clic en el botón Exportación de texto.
- Sysfilter extraerá todos los cuadros de texto en un proceso que llevará más o menos tiempo según el tamaño de los archivos y de la potencia del ordenador.
- Una vez terminado el proceso, en la misma carpeta que la escogida en el paso 2 vemos archivos en formato RTF, que son los que se procesará con SDL Trados Studio. Como Sysfilter emplea los estilos de Word de Trados para bloquear el código, no es necesario hacer nada más (salvo que se quiera aislar una determinada sección o una porción de texto para que no se traduzcan).
Como hemos explicado antes, no es necesario hacer más cambios en los archivos RTF, así que los importaremos en Studio y seguiremos el proceso habitual (salvo que se quieran hacer pruebas con pseudotraducción), que recapitulamos a continuación.
- Creamos un proyecto (en su caso) e importamos los archivos RTF que hemos obtenido usando Sysfilter.
- Los convertimos a formato SDLXLIFF traducible.
- Se traducen y se revisan los archivos siguiendo un flujo de trabajo normal.
- Se exportar los archivos RTF de destino.
En último paso de la sección anterior obtuvimos los archivos RTF una vez traducidos, con lo que ya solamente queda obtener los archivos CDR correspondientes para que puedan ser maquetados después. Para tal fin, haremos lo siguiente:
- Guardamos los RTF junto con los CDR originales en la misma carpeta. Es importante tener copia de seguridad, ya que Sysfilter sobrescribirá los CDR originales.
- Abrimos Sysfilter y hacemos clic en la pestaña Opciones de importación, como vemos en la siguiente captura.
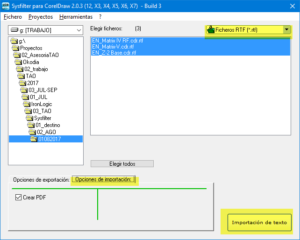
- Después nos aseguraremos de que la opción Ficheros RTF (*.rtf) está marcada en el menú desplegable de la esquina superior derecha.
- Si así lo queremos, hacemos clic en la casilla de Crear PDF, y después en Importación de texto.
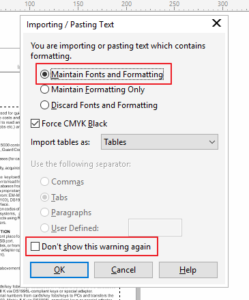
- Si nos aparece este aviso, se pueden marcar estas dos casillas:
- Ahora solo toca esperar a que Sysfilter concluya el proceso. A veces CorelDraw, que se abre en segundo plano, se cierra tras la conversión del primer archivo, lo que nos obligaría a repetir los pasos las veces que sean necesarias. Una vez concluido el proceso, en la carpeta que hemos escogido veremos los archivos CDR traducidos, que podemos abrir con CorelDraw para maquetarlos.
2. Aegisub
Descargable: https://aegisub.org/downloads/
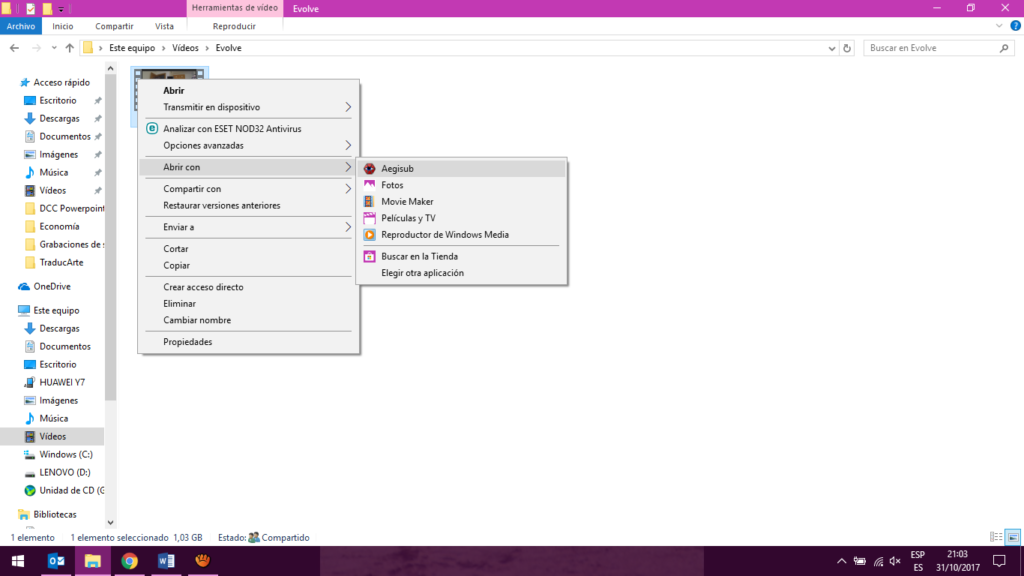
Go to the video to be subtitled, right-click and select Aegisub from the dropdown menu:
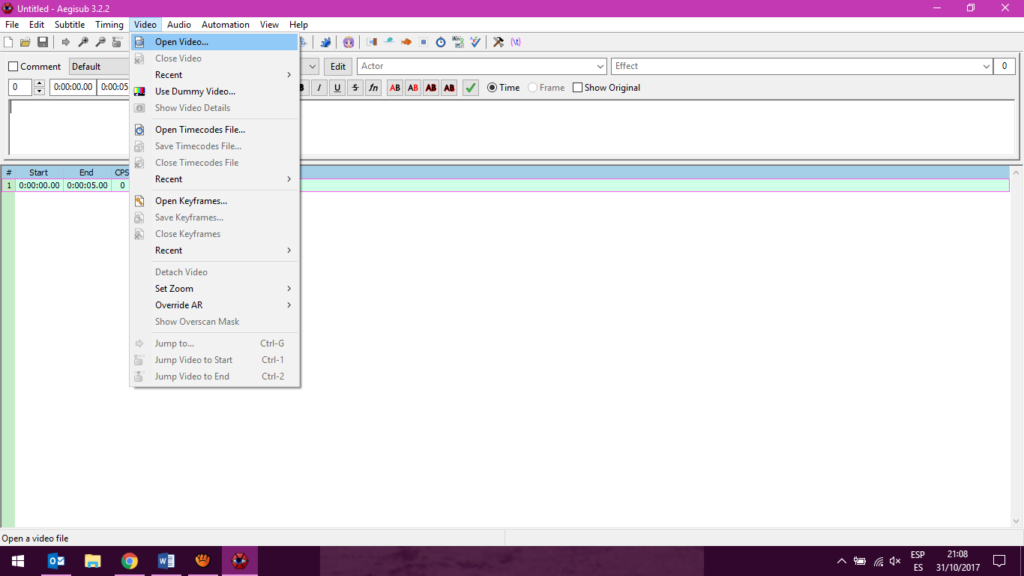
Another option is to open the Aegisub software and select the video via VIDEO:
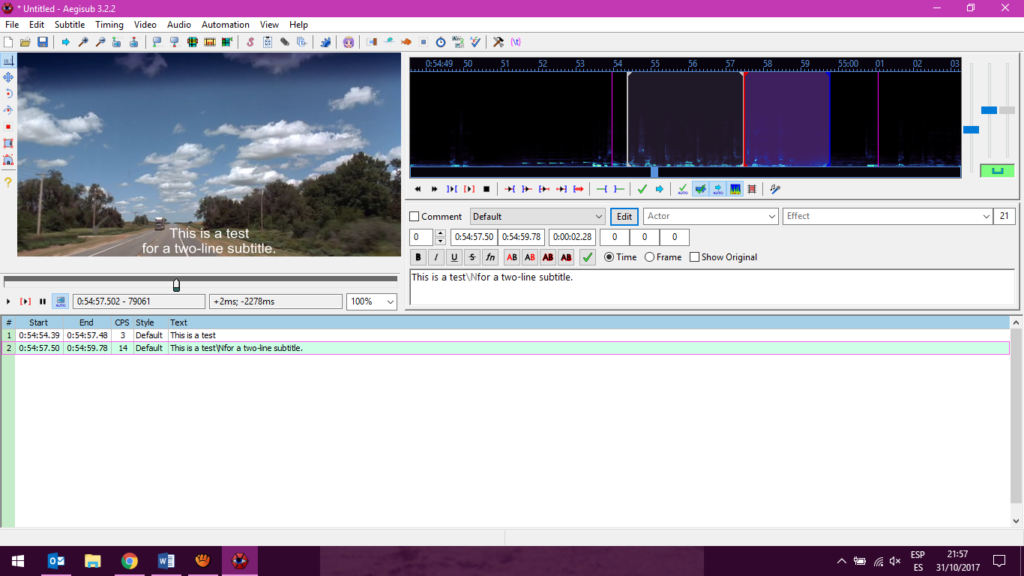
The size of the video window can be adjusted as preferred. Under this window, the subtitle grid will be shown. The grid includes not only the subtitle text, but also its start and end time codes, its number of characters per second, and the style of the text.
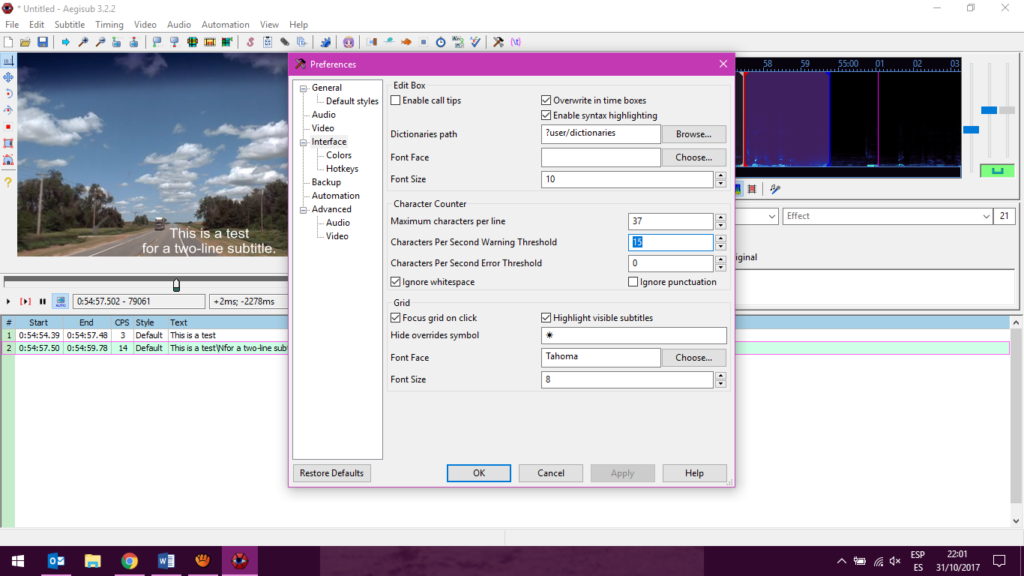
It is important to consider that the recommended number of characters per second ranges from 12 to 17, depending on the client. This is due to the average reading speed of subtitled audiovisual product consumers. To surpass this recommendation may result on the viewer not being able to read the subtitles. This minimum can be set at VIEW > Options > Interface > Characters per second warning threshold:
If the subtitler exceeds this threshold, the CPS section of the grid will appear in bright red as a reminder:
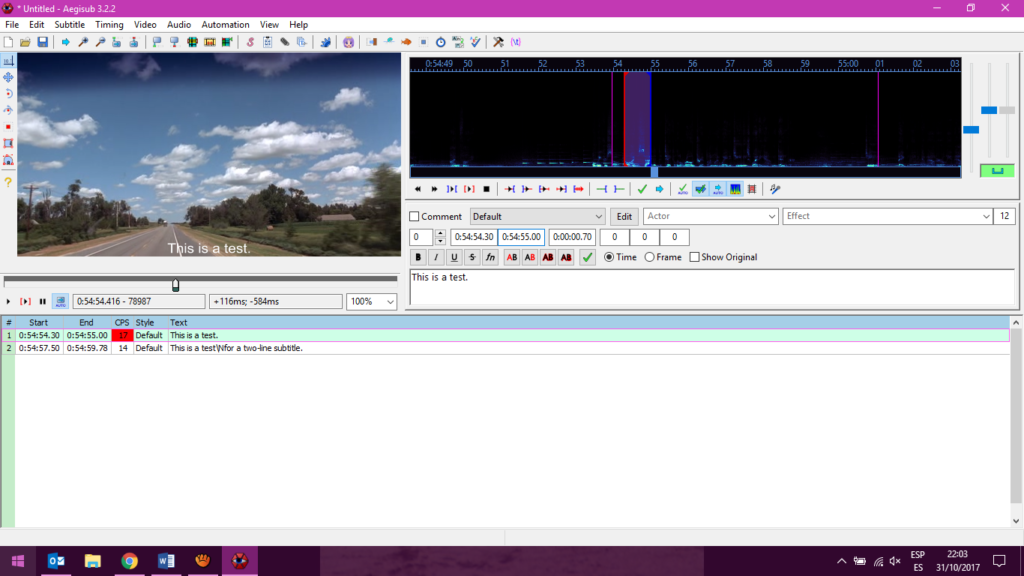
To the right of the video window, the audio view and the text editor appears. While the audio view serves as visual support to help the subtitler setting the start and end time frames, the text editor is the box where the subtitler will write the subtitle text:

The last number that appears above the text editor (11, in this example) indicates the number of characters per line of subtitles. The recommendation ranges from a maximum of 35 and a maximum of 42, depending on the client and the support format of the video. This option can also be set at VIEW > Options > Interface > Maximum characters per line.
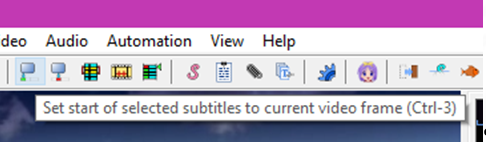
To start subtitling, select the line to work with on the grid and type or paste the text on the text box. This text will appear in said box, in the grid, and in the video preview window. To set the start of the subtitle at a specific video frame, go to that frame on the video or audio windows and then click on the button shown in the screenshot below, or select Control + 3.
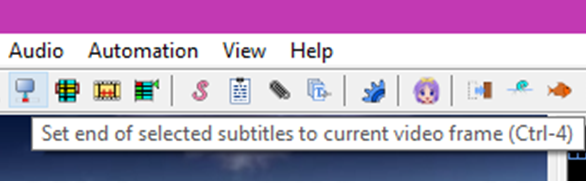
To stablish an end time, click on the following button or select Control + 4:
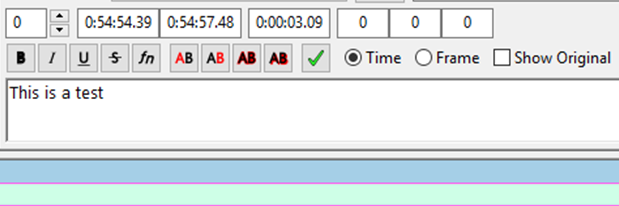
These times can also be introduced manually on top of the editing box, where one can find, among other options, the start time for the subtitle, the end time for the subtitle and the duration for the subtitle:
Once the subtitle is finished, by clicking on the enter key another subtitle line will appear on the grid. The preset start time frame will be the previous subtitle’s end time frame. It is important to consider that the recommendation is that a minimum 2 frames are allowed between two subtitles for the human eye to process the change of content.
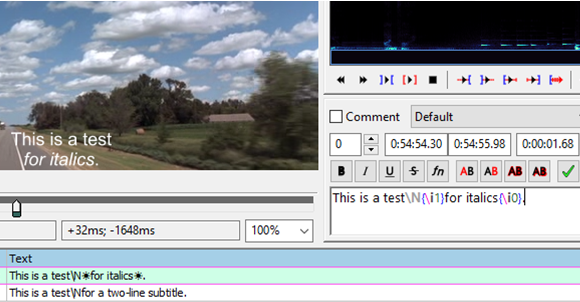
Typically, there are one-line and two-line subtitles. To have a two-line subtitle, since the enter key is used to open a new subtitle on the grid, write the command \N between the first and the second line, as shown in the screenshot below:
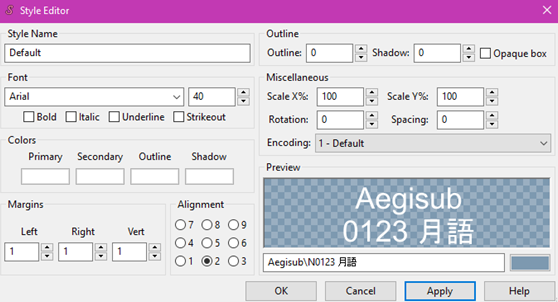
On top of the text editing box, there is the Styles manager tool, which can also be accessed via SUBTITLES. With this option, the font, color, size and alignment of the subtitles can be modified, among other parameters. The settings used in projects for Okodia are usually as follows:
Selecting the option Italic in this Edit box would change all the subtitles into italics. To italicize one word or one subtitle specifically (e.g., to indicate a speaker is off-screen), select the option I in the menu right above the edit box before and after the part to be italized:
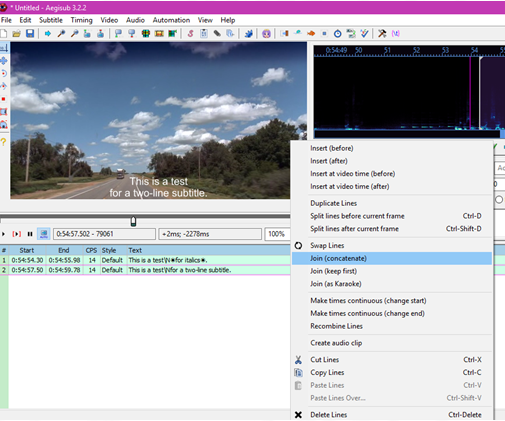
Two subtitles can be merged by selecting them both from the subtitle grid, right-clicking, and choosing the option Join (concatenate). It is important to consider that the recommendation is that a subtitle is never shorter than one second.
A subtitle can also be divided if longer than 5 seconds, by selecting the frame in which the subtitle needs to be divided and selecting the option Split lines before current frame or Control+D.
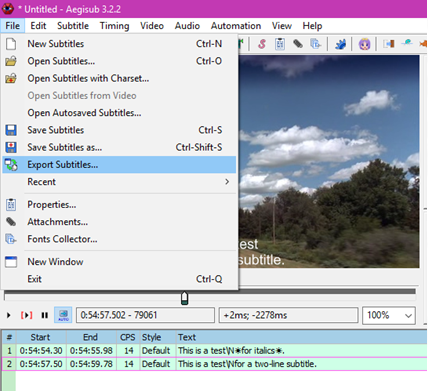
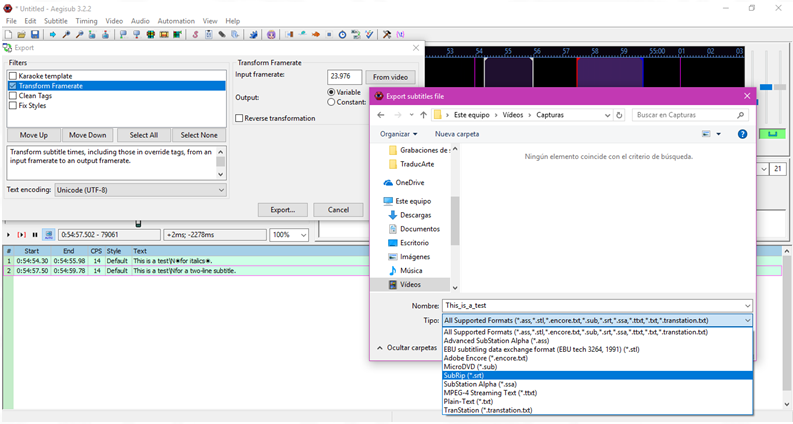
Aegisub target format is .ass. Normally, the final subtitle file asked by most clients and used in most video editing software is .srt. To convert the subtitle format, go to FILE > Export subtitles:
Select the option Transform Framerate and then click Export. Save the file as .srt:
3. Handbrake
Descargable: https://handbrake.fr/downloads.php
Después de instalarlo, al abrirlo por primera vez, es probable que Handbrake solicite la instalación adicional de .NET.
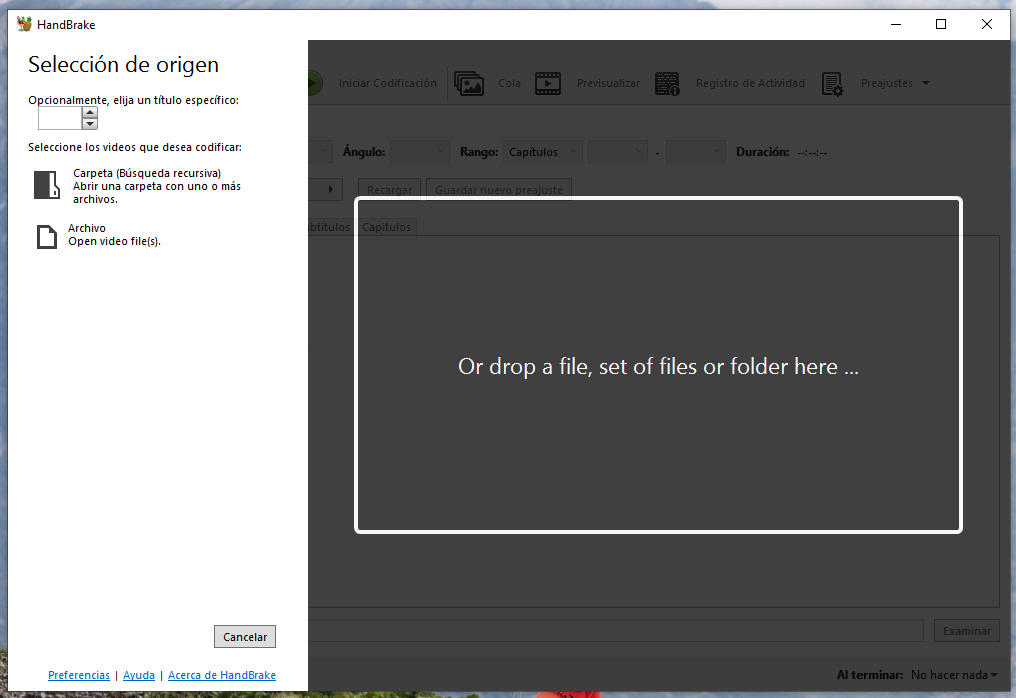
- Abre Handbrake
- Selecciona o arrastra el vídeo.
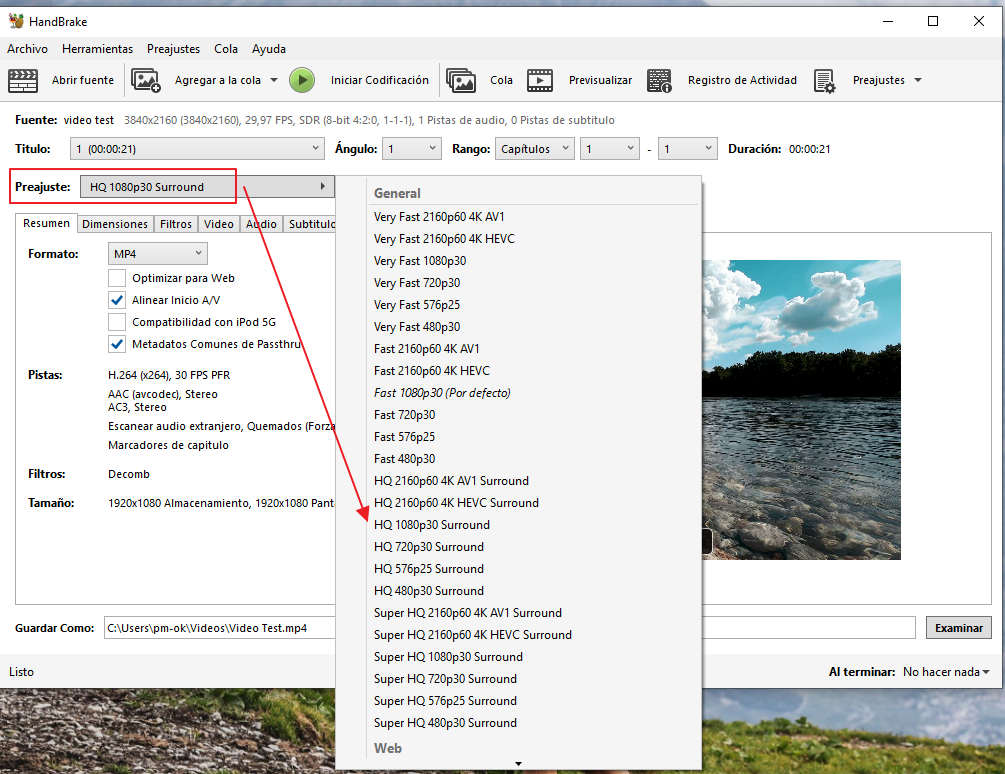
- Si el cliente ha indicado algún preajuste exacto, seleccionarlo de aquí. En caso contrario, usaremos por defecto «HQ 1080p30 Surround».
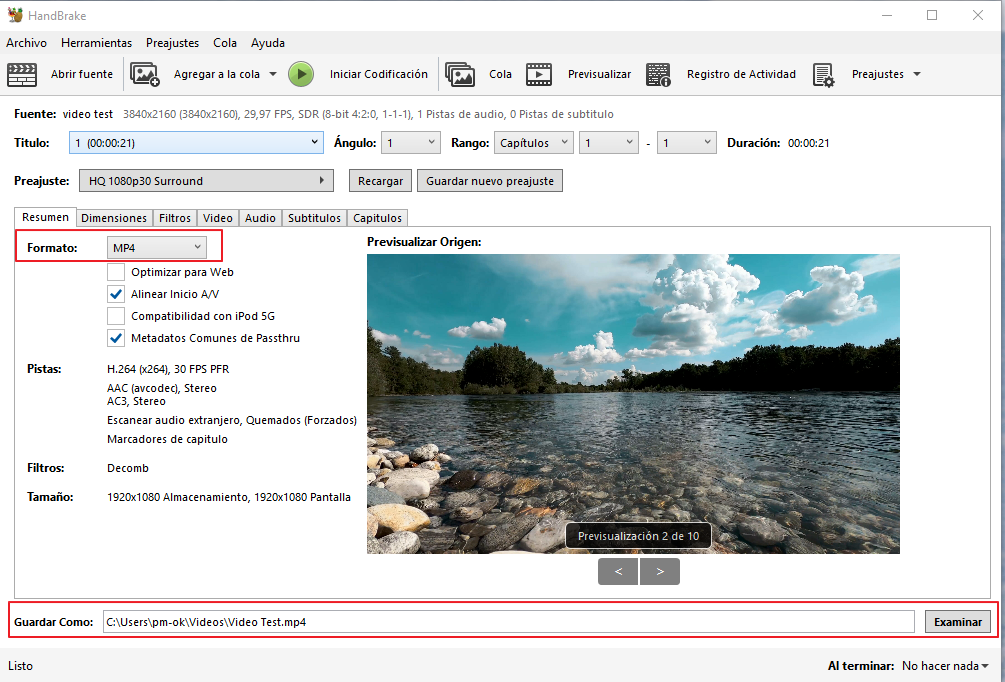
- Selecciona la ruta de destino y el nombre del archivo de destino, así como el formato de destino (por defecto, .mp4):
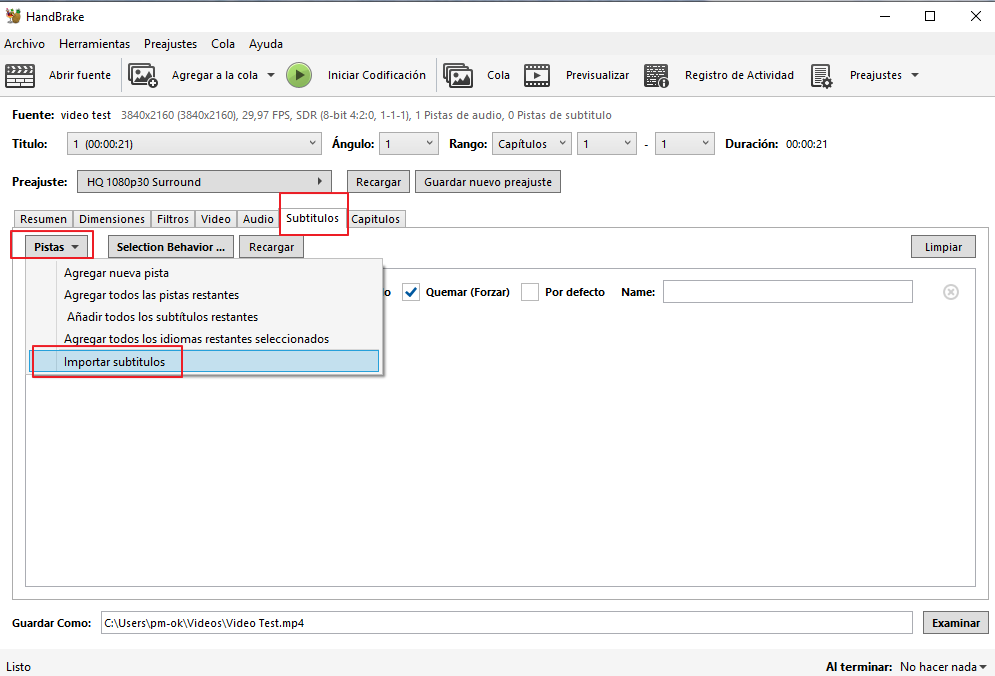
- Importa la pista de subtítulos (.srt):
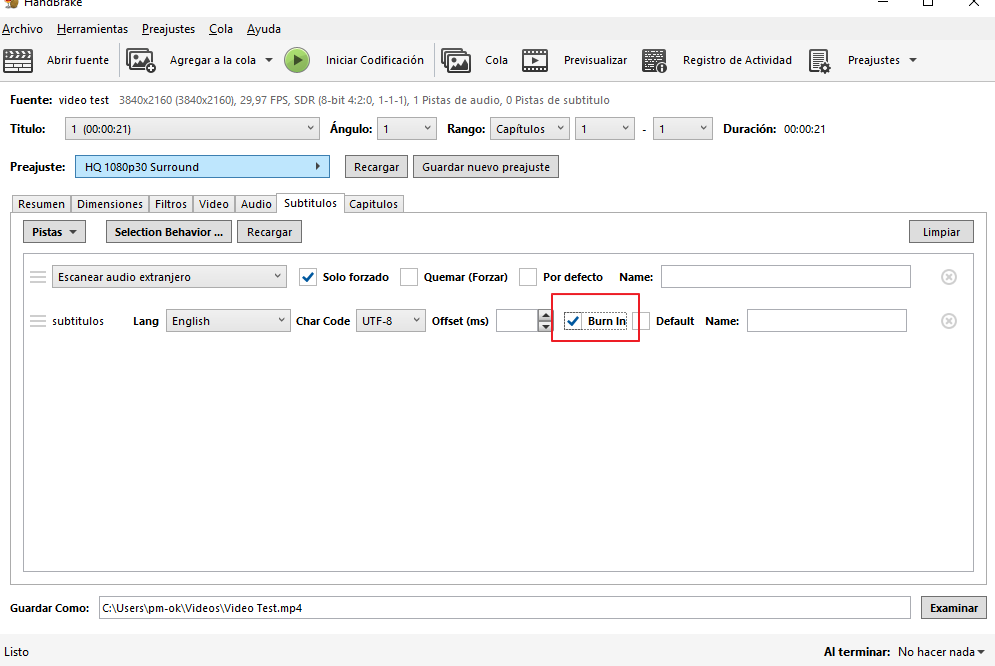
- Una vez añadida, marca la casilla de «Burn in» en la pista de subtítulos correspondiente:
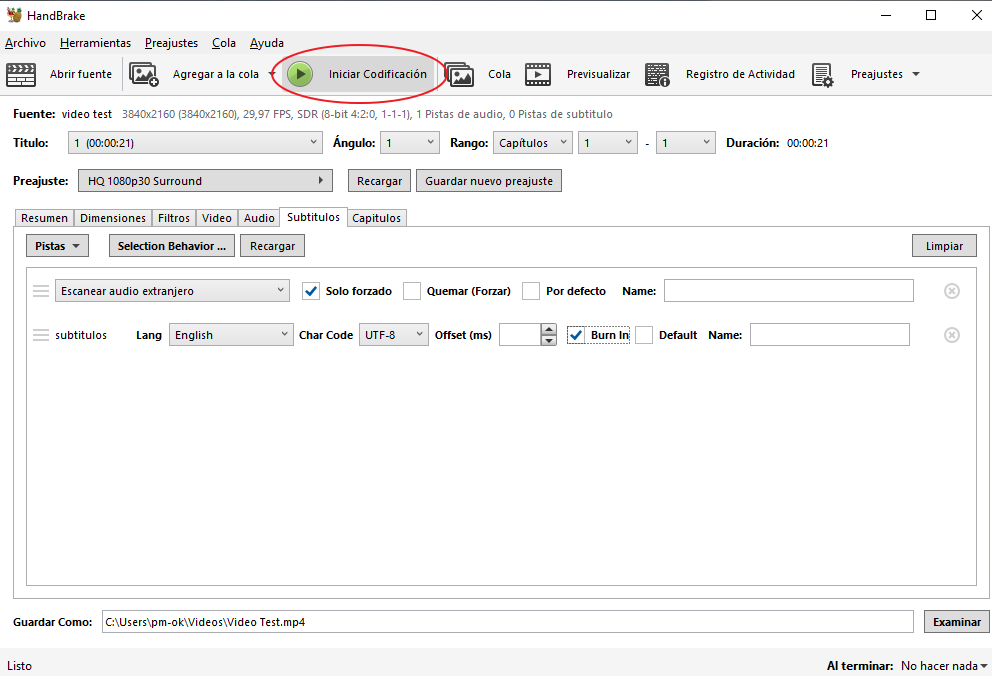
- Inicia la codificación (esto hará que se inicie el quemado de los subtítulos):
- Una vez finalizado, abrir el archivo para asegurarse de que se ha generado correctamente y que los subtítulos están quemados.