
Resource 01 – Okodia Groupshare server for SDL Trados Studio
1. Introduction
This manual is aimed at all resources working with Okodia in projects which include translation memories or termbases from Groupshare. Groupshare is the SDL platform created for centralising and sharing resources and for online project management.
We will see how to add server-based termbases and translation memories to our translation projects so we can use them for concordance, consistency and so on.
2. Adding the Okodia Groupshare server to SDL Trados Studio
The first thing you will need to do is to add the Okodia Groupshare server to your server list in SDL Trados Studio. Please follow the steps below:
- Go to File > Setup > Servers.
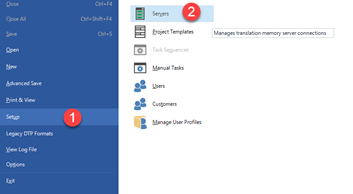
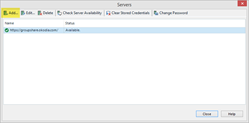
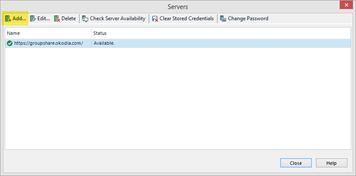
- In the next window you can add the server by clicking the Add button
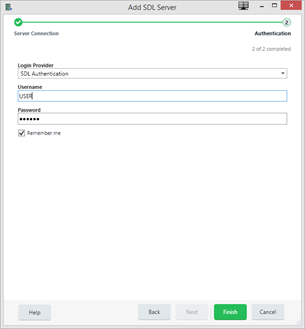
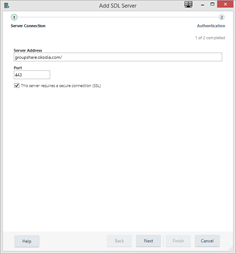
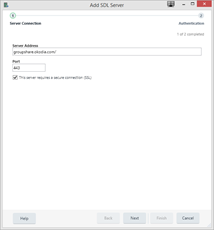
- Now please enter the Okodia Groupshare server details as per below.
- Server address: groupshare.okodia.com
- Port: 443
- Tick the This server requires a secure connection (SSL) box.

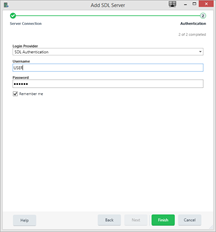
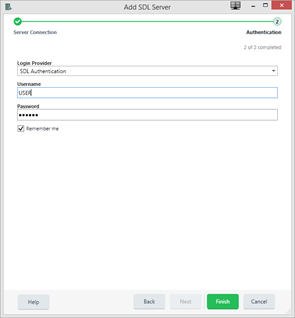
- Then you need to enter your credentials (username and password) as applicable. Press Finish and now the server will be added to your server list.
3. Adding a Groupshare translation memory in the new project wizard
When you are creating a translation project in your local machine following the new project wizard, you can add Groupshare translation memories (TMs) as applicable so you can get suggestions and do concordance searches. For that purpose, please follow these steps:
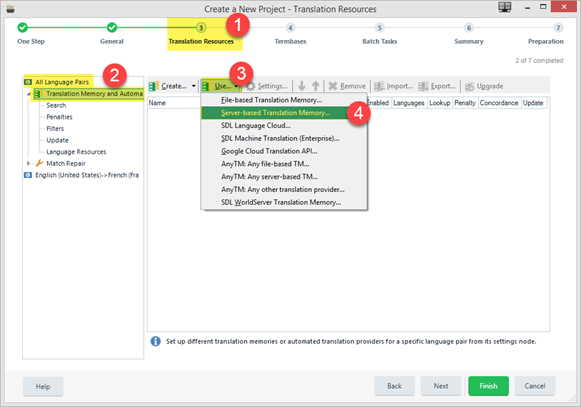
- In the third step of the wizard, Translation Resources, please make sure you are in All language pairs > Translation Memory and Automated Translation, as per steps 1-2 in the screenshot below.
- Now you will need to add the applicable TMs via Use > Server-based translation memory, as per steps 3-4 in the screenshot below.
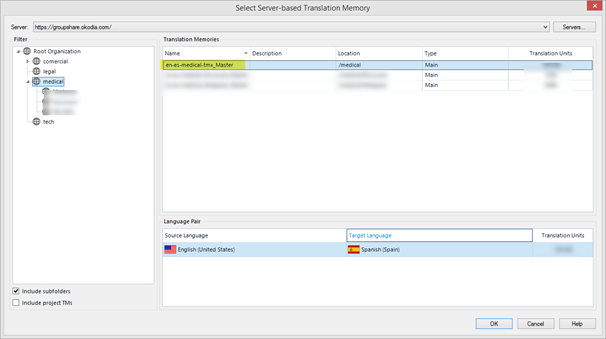
- In the next window, please choose the Okodia Groupshare server from the dropdown list. If you have not added the Okodia Groupshare server yet, please click the Servers button
![]()
- Now you can add the server by clicking the Add button
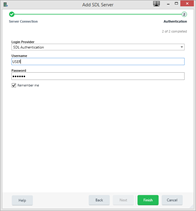
- In the next window, please enter the Okodia Groupshare server details as per below.
- Then you need to enter your credentials (username and password) as applicable. Press Finish and now the server will be added to your server list.
Once the server has been added, you can choose the applicable TM from the list (for example, en-es-medical_tmx-Master) and press OK so that it is linked to the active project.
4. Adding a Groupshare translation memory to a translation project
While working in a translation project in your local machine, you can add Groupshare translation memories (TMs) to your project as applicable so you can get suggestions and do concordance searches. For that purpose, please follow these steps:
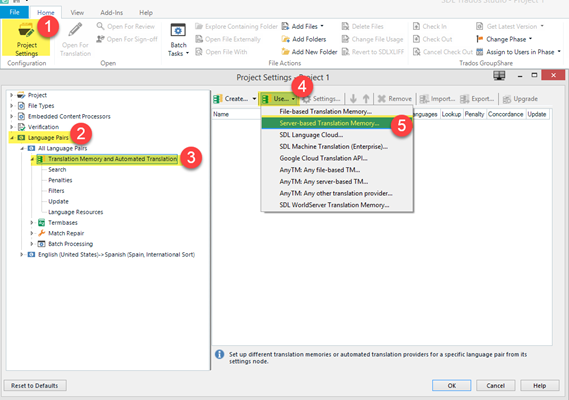
- In your project, open Project Settings and then go to Language Pairs > All language pairs > Translation Memory and Automated Translation, as per steps 1-3 in the screenshot below.
- Now you will need to add the applicable TMs via Use > Server-based translation memory, as per steps 4-5 in the screenshot below.
- In the next window, please choose the Okodia Groupshare server from the dropdown list. If you have not added the Okodia Groupshare server yet, please click the Servers button
![]()
- Now you can add the server by clicking the Add button

- In the next window, please enter the Okodia Groupshare server details as per below.

- Then you need to enter your credentials (username and password) as applicable. Press Finish and now the server will be added to your server list.
Once the server has been added, you can choose the applicable TM from the list (for example, en-es-medical_tmx-Master) and press OK so that it is linked to the active project.

5. Adding a working translation memory to a translation project
Due to restrictions in the Groupshare translation memories permissions, you will NOT be able to commit new or updated segments to the Master TM. The Master TM is updated once or twice a month by the TM manager, who is the only user that has such TM permissions.
However, so that you can get suggestions from the TM regarding segments you have translated or changes but which are not in the Master TM yet, we suggest that you create a temporary, working TM that can be populated with these segments in the meantime. For that purpose, please follow the steps below:
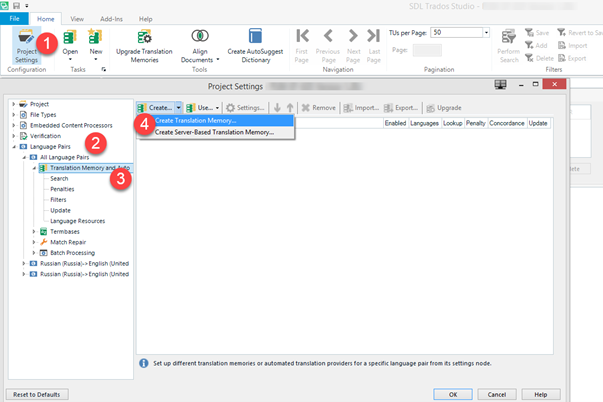
- In your project, open Project Settings and then go to Language Pairs > All language pairs > Translation Memory and Automated Translation, as per steps 1-3 in the screenshot below.
- Now you will need to add the applicable TMs via Create > Create Translation Memory, as per step 4 in the screenshot below.
- Give a name to this TM and select the path where you want to store and press Finish, as per in the screenshot below.
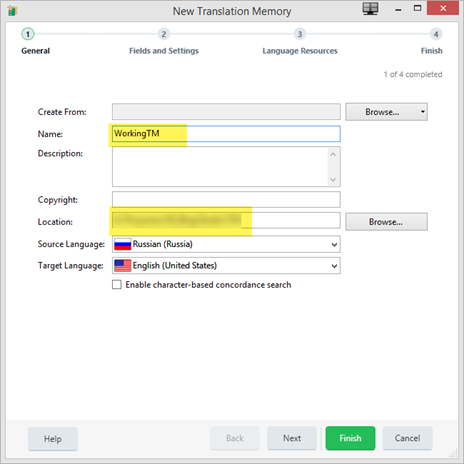
- The new TM will appear now in the list of TMs linked to this project. Please make sure that the Concordance and Update checkboxes are enabled so you can perform concordance searches and update the TM with new or changed segments, respectively.
![]()
6. Adding a Groupshare termbase in the new project wizard
When you are creating a translation project in your local machine following the new project wizard, you can add Groupshare termbases (TBs) as applicable so you can get terminology suggestions and use the Terminology Verifier QA engine in order to keep consistency. For that purpose, please follow the steps below:
- In step 4 of the project wizard, Termbases, click Use and then on Server-based MultiTerm termbase, as per steps 1-3 in the screenshot below.

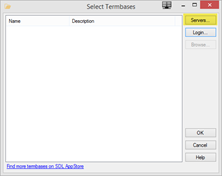
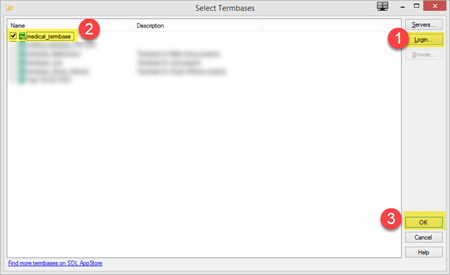
- If you have not added the Okodia Groupshare server yet, please click the Servers button in the Select Termbases window
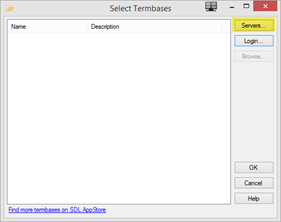
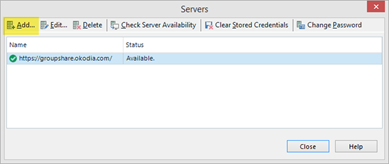
- Now you can add the server by clicking the Add button

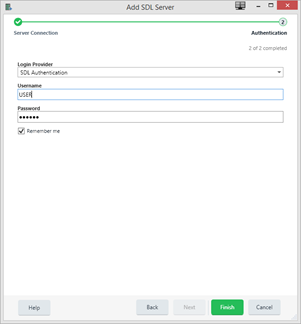
- In the next window, please enter the Okodia Groupshare server details as per below.
- Then you need to enter your credentials (username and password) as applicable. Press Finish and now the server will be added to your server list.
7. Adding a Groupshare termbase to a translation project
While working in a translation project in your local machine, you can add Groupshare termbases (TBs) to your project as applicable so you can get terminology suggestions and use the Terminology Verifier QA engine in order to keep consistency. For that purpose, please follow the steps below:
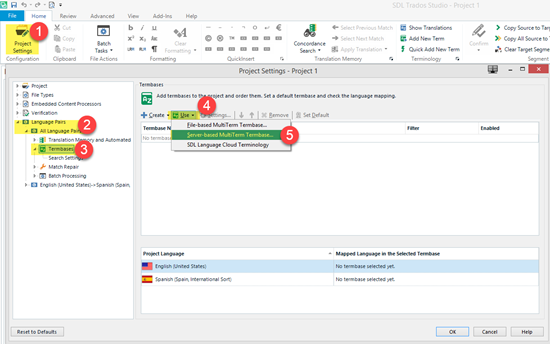
- In your project, open Project Settings and then go to Language Pairs > All language pairs > Termbases, as per steps 1-3 in the screenshot below.
- Now you will need to add the applicable TBs via Use > Server-based MultiTerm termbase, as per steps 4-5 in the screenshot below.
- If you have not added the Okodia Groupshare server yet, please click the Servers button in the Select Termbases window
- Now you can add the server by clicking the Add button
- In the next window, please enter the Okodia Groupshare server details as per below.

- Then you need to enter your credentials (username and password) as applicable. Press Finish and now the server will be added to your server list.
- Once the server has been added, go back to the Select termbases window, click on Login, choose the applicable TB from the list (for example, medical_termbase) and press OK so that it is linked to the active project.
8. Viewing the terms and details from a term base in a translation project
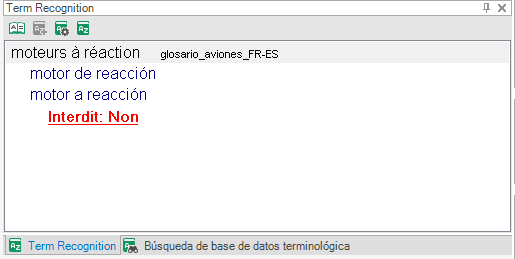
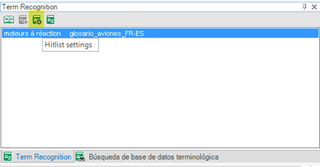
By default, when Studio displays terms in the Term Recognition window, there is no further information available, such as notes, definition, context or other (the fields will vary depending on each particular terminology base). It is convenient to have this information at a glance, especially in fields such as forbidden terms. To do this, first press the Hitlist settings button (the third from the left) as shown in the screenshot below.
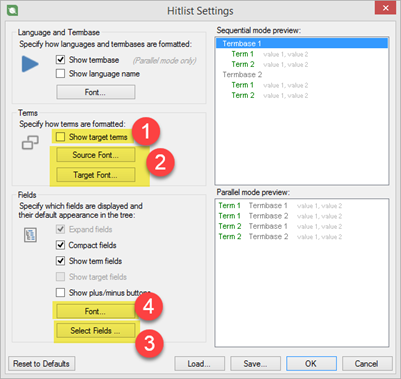
In the next window, we will need to check the Show target terms check box (1), and then we will be able to configure our desired format for the recognised terms (2), such as the font type, size and colour. Besides, in Select fields(3) we can point out the fields that Studio should always show, as well as configure the font for those fields (4). For example, the red colour could be used to point out the forbidden or valid terms.
The following screenshot shows the same term once we have adjusted all the options to our liking: